But, when I was done, I really looked at it and realized that you couldn't tell there was supposed to be anything there. The texture of the yarn didn't lend itself to the pattern, plus, I think that just purling really wouldn't do the trick, at least with this size needles. *sigh* Live and learn.
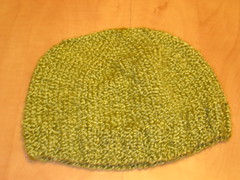
Now, I've finished up the boring hat without a frog and it doesn't look too bad. It did come out a little bigger than I anticipated but it still fits pretty good.
======
My Boring Hat
Size: Adult (22")
Supplies needed:
- 1 skien of Bulky Yarn [I used about 1/2 of a 6 oz/185 yd skien of Lion Brand Homespun in Apple Green]
- US #9 dpns (if they are 7" dpns, make sure you have a set of 5 'cause all the stitches wont fit on just 3 dpns)
- US #9 circular needles, 16" cable (you can do the hat just on dpns, but the circular makes it so much easier!)
- Stitch markers
- Yarn/tapestry needle
Gauge: 7 stitches = 2 inches
Abbreviations:
k = knit stitch
ssk = slip, slip, knit (right-leaning decrease)
pm = place marker
NOTE: I knit combined, so if you don't, instead of ssk, work a k2tog=knit 2 together or whatever will result in a right-leaning decrease. Visit KnittingHelp.com for a better explanation about what a right-leaning decrease is.
Directions:
- Cast on 81 stitches and join in the round by knitting the first stitch and the last stitch together (It makes a better join... really! or if you are a join-master, just knit 80 stitches and join as you usually would.) Pm to mark the start of your rows.
- Knit 8 rows of the rib of your choice (you can do 2k & 2p all the way around, or 3k & 1p, or garter stitch, or whatever tickles your fancy) for the edge of the hat.
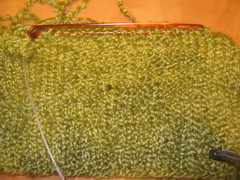
- K every round until your hat measures about 5 1/2" from the bottom, including the ribbing.
- *k 14, ssk, pm*, repeat from * to * until the end of the row. (You should have 5 markers on your needles, including your original marker. You should also now have 75 stitches)
- Decrease Row: *k until 2 stitches before the marker, ssk, slip marker*, repeat from * to * until end of row. (You will be decreasing 5 stitches on each round.)
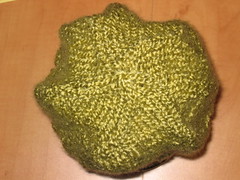
- Continue repeating the Decrease Row for 12 more rows, until you have 10 stitches left on your needles, moving your hat to the dpns when they can no longer be worked on the circular needles.
- Cut yarn leaving about a 6 inch length. Using the yarn needle, thread the yarn through those last 10 stitches and pull tight. Push the yarn needle through the little center hole and then weave the rest of the yarn into the hat.
========
I really hope my best friend's girlfriend likes the hat! And since I have so much yarn left over, I've decided I'll make her some boring mittens to go along with her hat. I'll post when I've made them.
A few days later, I showed the hat to my mom and she loved it! So, I decided that I had to make her one too. Started it last night and should be done today.
eta: They liked the hats! yay!


No comments:
Post a Comment